facebook.com

Friday 12 April 2013

Best Value Manual Speedlight, The Yongnuo YN-560 II

Hands down, without any doubt the Yongnuo yn-560 ii Speedlight has to be the best £50 I have ever spent on photography equipment. Lately I have been working on a lot of projects that required a small and highly portable studio setup for use in a studio environment and on location. Were possible when shooting any studio or on location light setup I tend to opt for my studio strobes and power packs or an SB900 so I have to admit I was expecting to be a little let-down by this bargain Speedlight. However all photographers know there are times when portability will limit the equipment choice and photography can sometimes be a lot about compromise.  Actually I think compromise is the wrong word, I don’t believe the quality of your work should be compromised. Instead you should look for other creative solutions, it is threw this problem solving that I have the most fun.
Anyway back to the YN-560 II. I got mine for this project as my SB-900 was currently engaged and for such a good price I thought there was no harm in purchasing another speedlight. This is where I discovered what a little gem the YN-560 was as shooting off camera and in full manual mode I found that not once did I find myself wishing for the SB900. The strangest of thing happened after a few day with the YN-560, even with use I the SB-900s I still find myself pulling the YN-560 from the bag, I love it! I think the key to this is back to a point I always make about photographic equipment and that is, what is the point in spending anything on kit if you are too worried about breaking it to really use it. A camera is just a tool so should be treated like one. Yes you should look after your tools but if you don’t use them they are worthless.  Cheap equipment you use will always take better photos than expensive equipment you don’t. My off camera Speedlights often take a beating. I shoot a lot of extreme sports and shooting on location often in muddy woods and with bikes flying past my kit means that I risk kit on a daily basis. The YN-560 allows me to not worry about anything but the photos. I regularly hang my YN-560 from trees or close to the action and allowed me to create some impressive photos.

Pros
1.       Value for money
2.       Solid construction
3.       Simple to use
4.       Professional features
5.       Built in diffuser and bounce card
6.       External power connector
7.       Zoom from 24-105mm
8.       2 slave modes
9.       Power save
10.   PC connector
11.   Beeps
12.   High FPS when used not on full power
13.   Solid metal hot shoe and locking system
14.   Good power output (I rarely use at full power)
15.   Easy you read Screen and backlight
16.   Comes with a stand and bag

 Cons
1.       No high speed sync
2.       Only works on full manual mode
3.       Test button is a little stiff

Sorry this looks really biased but I really have not found much wrong. If you are worried about having no auto mode and high speed sync, Yongnuo have also released the yn-565EX for both Nikon and Canon systems that can be found for around £100.

I really would recommend the Yongnuo yn-560 ii to anyone. In my opinion this is the best value manual flash on the market.

YONGNUO YN-560 II ELECTRONIC SPEEDLIGHT
565EX ETTL Speedlite Flash for Canon
YN-565EX Speedlite for Nikon

Really hope this helps everyone looking at Speedlights.

AlexAndrews

Smoke Photography examples


I have to admit I was a little disappointed about my last Smoke photo examples so decided I would show some of my other smoke photos that I sell via IStockPhoto and took using the same techneques. I plan to write a little article about my experiences using Stock sites but for now here are the smoke photos. What do you think?
Alex

Monday 8 April 2013

Cheap equipment you use will always be better than expensive equipment you don’t

"What is the point in spending £1000 on kit if you are too worried about breaking it to really use it. A camera is just a tool so should be treated like one! Yes you should look after your tools but if you don’t use them they are worthless. Cheap equipment you use will always be better than expensive equipment you don’t. Stop cuddling you kit and get out and use it!"


AlexAndrews

Sunday 7 April 2013

Extreme Sports Filmmaker Nico-T - Questions and Answers

For my university course I have been conducting a case study looking at the workflows of extreme sports filmmaker. Along with photography I have always been interested video production so found the answers I received a huge help to my work. Because of this I have decided to share the answers I received as I believe they are an interesting read for anyone looking at extreme sports filmmaking. I would like to thank Nico-T for his help on my project so please help support his work @ http://www.pinkbike.com/u/Nico-T/

Does a small/large crew effect planning for bad weather?

For filming mountain biking I shoot entirely on my own, this means often lugging equipment up and down the mountains and the riders often get used to carrying tripods and jib arms down the tracks as they ride! Bad weather is something that I go with, generally I have a look at the weather forecast and for something like free-ride I tend to go with it. But when filming BMX/Park riders you can't film if it rains so thats always something to bare in mind. As I said I work on my own for MTB productions but on other shoots (corporate, short films etc) planning is EVERYTHING and a few more crew members always helps.

To what extent do you plan shots/how much do you work on the fly?

I will generally know the major features I want to shoot, I try not to research it too much as it can manipulate how you shoot it, I like to look at something and shoot it how I want. This was hard when I went to Whistler MTB park in Canada as its been shot 1000x.

Does the planning or crew size effect how creative you can be?

Planning helps and only allows you to be more creative as you can think outside of the box but when you're on location a lot of my framing and composition is made up on the spot, I dont abide by the 180 degree rule (fourth wall rule) and often make tracks seem longer than they actually are by shooting several tracks and putting them together.

How much of an idea about look and feel of a video do you know before the shoot?

Im not going to lie, for my film "Being Free" I entirely built the segments in post production, I went out, did a small interview about them, the tracks, why they ride etc then in editing I was able to build the story (completely oposite for to a fictional story based film) But a lot of this is documentary style so its a mistake to try and build a story before you meet/talk to the rider. However films such as "Life Cycles" clearly has a narrative and does it very well where as the famous "New World Disorder" series just shoots segments and is all about the cycling (arguably i'm more like them)

How many days does a short video take to shoot?

One to two days depending on location, lighting and weather oh and if the rider crashes hard.

How much time do you spend on planning and logistics?

Not long, I phone the rider agree a date and location and let them show me what they think will look good/I throw ideas out there on set.

How long does a short video take from getting a brief to finished product?

Could be a day, could be several depends on the project.

Do you see smaller/larger production teams as a threat with the changes in DSLR technology?

I can undercut bigger companies by producing high(ish) quality with my DSLR (most clients cant tell the difference and love the quality.) Its definitely a threat as the industry is becoming more saturated.

And if possible anything else you think is important for my question?

Workflow: Shoot, Store, Edit, Release Online.

Camera set up:

Canon 550D
Sigma 50 f1.4
Canon 70-200 f4
Sigma 10-20mm f4
Dolly
Slider
Jib Arm

Monday 1 April 2013

Basic Studio Equipment for Lighting Newbies

Over the next few months I am going to be showing some simple studio and on location light setups. Before I start on in-depth articles I thought I would add a quick bit about what equipment Will be required. Over the years I have had amazing success with cheaper equipment so along with a list of the equipment I will use I am going to add links to the budget products I have used.

A Speedlight
YONGNUO YN-560 II ELECTRONIC SPEEDLIGHT

Wireless triggers
16 Channels Wireless Radio Flash Trigger SET with 2 Receivers LF106

White shoot through umbrella
CowboyStudio 33" inch White Translucent Umbrella for Professional Photography and Video Lighting Diffuser & Reflector

A light stand
Photography Light Stand for professional photo studio photolamps

A flash/umbrella mount
Multi-function Adjustable Cold Shoe Mount Umbrella Light Stand Bracket/Flash Holder with 1/4" 3/8" Thread & Ratchet Design

A popup reflector
43" (110cm) Collapsible / Portable Photographic Lighting Disc Reflector for Studio or On-Site Use - Translucent, Gold, Silver, White & Black w/ BAG!

Top Budget Kit For Starting Out


As a photographer who often has a tight budget for kit, I decided I would create a list of the equipment I used when starting out. Because photography is such a broad subject and with kit chooses changing depending on your shoot type, I am going to create a list of a good general kit that will help young photographers explore photography and experiment before looking for a specialism. I will split my kit into 2 parts starting with what I consider essential kit and moving into more experimental equipment. I will also supply a list of recommended equipment for use on a budget from the saviour of young photographers that is Amazon.

Essential:

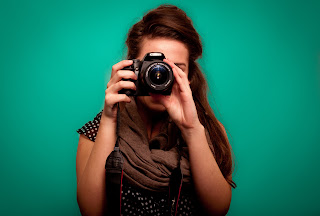
A DSLR and a kit lens (digital single lens reflect camera), both Nikon and Canon make amazing affordable DSLRs and even the bottom of the range cameras now perform as well as professional DSLR from that past. Combine them with Professional lenses and they can take stunning photos (having a bottom of the range DSLR body is not excuse for bad photos). Despite kit lenses being the biggest let-down of performance in budget DSLR I would still recommend getting a kit when starting out. A lot can be done when using cheap kit lenses and having lenses that you can learn on is always important.All I have to say about all consumer DSLRs is TAKE THEM OUT OF AUTO MODE! If you are just looking for a better quality point and shoot DON’T GET A DSLR!
I shoot Nikon but I would look at both Canon and Nikon Options. My tip is to look at the top of the range cameras for both companies and all other products they make and invest in what you believe is the best company. This is important as you will build up your kit over time and invest in lenses, flashes and triggers along with other items that will not work on both companies’ products. The last thing you want to do is have to invest in all new equipment when you come to changing your DSLR body. This is also why I would mainly look at Nikon and Canon over companies such as Sony.

Nikon D3200

Nikon D5200

Canon EOS 1100D

Canon EOS 100D

A High speed Memory card, there is a lot of talk about if you should use one large card or lots of smaller cards to minimise losses if a memory card becomes corrupt. This is important for professionals but as a beginner I would not worry so much. Due to also doing lots of DSLR video I tend to use 16gb and 32gb cards and manage my cards to minimise losses. I find using small cards protects your work but doing lots of sports photography I often find i miss moments when my card becomes full. I find its best for me to use larger cards but change them every 100 photos or so. This means I can choose to change my card when I get the opportunity to and not be forced to change cards when it’s full. This is made far better by the fact that even large cards have dropped hugely in price.

Transcend 32 GB Class 10 SDHCTranscend 16GB Class 10 SDHC

I good camera bag with room to expand, I was lucky with my equipment when I started as I managed to, due to extensive research, get little wrong when it came to what to get and invest in. However If I had to say one thing I would do differently it would be getting a camera bag with room to expand. When I started Photography I was very young and had no idea it would become such a large part of my life and therefor end up with so much equipment. My first bag was along the lines of a Lowepro Rezo TLZ 20. It was an amazing bag, well made and well-designed but has no room for extra lenses. I still use this bag today for a single body and scouting lens combination because it’s ideal for quick access but usually this is alongside my huge Lowepro Vertex 300 AW. Anyway I would recommend looking for camera bags with a little room to expand kit. My friend really loved his over the shoulder bag that could hold a body and lens, and extra lens and a flash along with small accessories. I believe this bag is the perfect choice for a beginner and gives you a little room to carry some snacks.

Lowepro Adventura 140 Shoulder Bag for DSLR Black

A good tripod, this is a vital part of lots of photography. Okay there are lots of photos that won’t need a tripod but having a good tripod to hand when the time comes is important. over the next few weeks I will do an in-depth review of my tripod and talk about some of the finer points of choosing one but I think you really need to consider a few things when buying one. The first point is that a tripod is an investment much like lenses. I know many photographers who have used the same tripod for most of their lives. If you buy a good tripod the first time round it will save you time and money in the future. The next point is something I was shocked how many young photographers didn’t know. Professional tripods come in two parts, the legs and the head. This means you can choose a good set of legs and use them with both video and stills heads without having to buy the whole unit again. The most important thing about any photography equipment and particularly tripods is the ease of use. I find that kit that is clumsy and annoying to set-up gets left in the bag. You want to select tripod legs and particularly a head that are fast and comfortable for youto use. Heads come in many types, some for stills and some for video. As a videographer and photographer I have both a liquid video head and a ball stills head. Despite both heads being amazing it is important to know the limitations of the heads you buy. For example my video head (Manfrotto 501HDV) has a lovely liquid pan and tilt, tension controls and an auto balance. This is ideal for DSLR video but almost useless for Stills photography as there is not control over rotation of the camera from landscape to portrait. My ball head on the other hand is amazing for stills photography as it quickly allows me to move my camera to any position, is very light weight and has a very fast quick release place with lock. All this makes it an idea stills head but for video I would probably be better going hand held. For the tripod legs it is important to get a good ridged system. Remember that you could be shooting in all conditions and a sturdy tripod it vital. I once used a cheepo tripod from Tesco and the wind blew my camera over and smashed the lens. If you invest in a good tripod the first time it will minimize risks like this. Outdoor long exposures will also be hard in wind with anything but a good stable tripod. I use Manfrotto 55xprob tripod legs with both my video and stills head and love them. I have never had any problems and a good build quality and sturdy construction means I will probably use them for years to come.

Manfrotto 055XPROB Tripod Legs Only - BlackManfrotto 494RC2 Ball Head with Friction Control

Expanded beginner kit “hobby kit”

UV filters to protect lenses. This is something I find a lot of people use to protect their lenses. I have used one for years as I shoot a lot in dusty/sandy places but knowledge of when the filter is affecting your image is important. Filter will create imperfection such as lens flair if used in some situations. Filters on amazon are so cheap it’s never a bad thing to get one.

TRIXES 52mm UV filter

A lens hood, not only does a lens hood stop stay light from catching the elements in you lens and creating lens flair but it also helps to protect the front of your lens. I picked up my lens hoods on Amazon for less than £5 each and they have stopped my hitting my glass 100s of times.

52mm Flower Lens Hood

A shutter remote, there are many times when I use a shutter remote. As you start to learn about photography I am sure you will find yourself trying long exposures. Even on a tripod just the vibration of you pressing the cameras shutter bottom can be enough to create a blurred image. Both wireless and wired remotes on Amazon are really cheap so it does not hurt to get one. Also if you are like me you will find that sometimes when experimenting, you are your only available subject and using a timer is far too slow and annoying.

Neewer Wireless Ir Remote Control Shutter Release Ml-L3 For NikonCanon Remote Control RC-06

A Speedlight, the day I got a Speedlight changed my photography forever. I would look for flashes that can be used off-camera as a slave from your on camera flash. Basically a light sensor on the Speedlight detects your on-camera flash firing and fires the Speedlight. I could talk for hours about Speedlights and lighting but all you need to know is you will only realise how bad an on-camera flash makes an image look when you try an off-camera flash.

YONGNUO YN-560 II SPEEDLITE With The Standard Hot

Flash Radio Triggers, once you have played with your off-camera flash you will find that its light sensor can be a little temperamental at times. A bright day or placing it in strange places can stop it detecting you on-camera flash. Radio triggers are basically 2 little wireless boxes, one goes on your camera hot shoe and the other on the flash hot shoe. When you release your shutter a signal is sent from the camera to the flash by the triggers and the flash is fired. Sadly flash triggers are one thing that you will almost certainly have to upgrade if you are on a budget now. Cheap triggers can be found on Amazon for less than £30 and are an amazing introduction to off-camera flash technology’s the problem is that once you need more professional triggers that have TTL and high speed sync they can cost £100s.

16 Channels Wireless Radio Flash Trigger SET with 2 Receivers LF106

A popup reflector, this is as simple as it sounds, a popup reflector is uses to reflect and manipulate any light in your scene. Reflectors are an amazing and cheap way to improve the lighting in your images.

43" (110cm) Collapsible / Portable Photographic Lighting Disc Reflector for Studio or On-Site Use

A polarizing filter, as you experiment with your photography you will find there are times when distracting reflections ruin your images. A circular Polarizing filter helps remove reflections and increase saturation. Unlike most filters polarizing filter are almost imposable to replicate in post-production.

Leadasy New 52mm SLIM CPL Circular Polarizing Filter
A 50mm prime lens, the day I got my first 50mm prime lens was a big step for me and my photos seemed to instantly improve. Prime lenses are very fast for better depth of field and performance in low light. They are well worth the investment. See my “Prime time” article for more information.

Prime Time Why Shoot Prime

The equipment I have linked on this page is often a cheap alternative for hobby photographer to experiment and not all recommended for professionals. I have compiled this list in order to show just how much you can get on a budget. I have owned most of this equipment in my early days as a photographer but have since replaced some with more professional equipment.

AlexAndrews


Friday 29 March 2013

"How 2" - Smoke / Particle Photography

Since I published my smoke photos I have had many people ask about how I photograph particles and smoke. Because of this, I decided more than any other photo, this should be my first in detail ‘how 2’ post. I love photographing smoke as its random nature means that you will never capture the same image twice.
 
Smoke Example
The Kit:
Essentials:
DSLR
Speedlight or strobe with remote triggers
A Black Background (I use A1 black card)
A particle emitter (I use incense sticks for smoke)

Optional:
Softbox (I used my homemade one)
Black card or other light canceller (I used the black side of a popup reflector)
Tripod
Adobe Photoshop (to colour/ invert the smoke)

Method

Lighting Setup (Top down)
Due to the smell of the incense sticks I use to create the smoke, I decided to take my photos in the utility room at my girlfriends. This meant I could use a worktop as well as to not smell the house out. First I Whitetack my background card to the wall behind the worktop. I then placed the incense on wood to stop it burning the worktop. Placing the incense as far from the background as possible will make the lighting easier just so long as the background still fills the frame. I used a tripod for my camera as autofocus will never really work on the smoke (I just focus on the incense and lock the focus). You can also work handheld but a tripod will stop you having to re-focus. The hard bit about photographing smoke is the lighting. You need to light the smoke without lighting the background this is why having your incense/smoke as far from the background as possible will help. Left is my lighting diagram and below a zoomed out photo of my set.  I used my homemade soft box here to better control where my light falls as my soft box has a band around the front edge. I also used a black popup light canceler as the flash was reflecting from the white wall and lighting the background.
My Quick Setup
 

I believe my Speedlight was set at about ¼ power but flash setting and camera aperture will need a little trial and error. When lighting anything with a Speedlight like this remember that your flash becomes your shutter and will freeze the motion of the smoke. Your cameras shutter speed will also only affect the exposure of areas not lit by the flash. Because we need our background black its best to set your camera shutter speed at your fastest sync speed that on my kit is 1/200 of a second.
Post Production
After you have captured your images, pictures like this allow you to get creative. I would try inverting your image colours so the smoke appears black on a white background. This can be done by selecting Image-adjustments-invert on Adobe Photoshop. I would also try creating a solid colour layer (colour of your choice) above your smoke layer and then going through the layer blending modes and see how it colours your smoke.
 
Hope this helped
AlexAndrews

Wednesday 27 March 2013

Cokin filter sets, yay or nay? 5 reasons why it’s a good investment and my modification

Cokin Filter Set

I have always loved Cokin filters, the high quality of the products and a mount that fits all sizes of lens makes it a great investment for all photographers who regularly use filters. The reason for this article is due to a conversation I had with The University of Winchester lecturer Richard Trebilcock who is always an interesting man to talk to about anything related to cameras, due to his experience in this field. Anyway, we began talking about filters and if there is a need for them with all the post process filters and gradients. To some extent I agree with this as colour and effects filters can usually be applied in post with more control and the ability to turn them off ( that’s always nice) BUT I tend to only really use ND, polarizing and UV filters that apart from a few stops of exposure cannot easily be mimicked in post. After this conversation I decided I would create a list of why my Cokin filter set is still a valuable addition to my kit.

1.       Control over sky exposure using ND (neutral density) filters has to be the No.1 reason for me to reach for my filter set. Tip 1 is to try pushing a standard ND filter halfway into the holder, this creates a better contrast line for your horizon (this will only work for some photos e.g. Seascapes but try it out as you never know till you try)

2.       Daytime Long exposures. Some if not all my favourite photos of rivers and the sea use long exposures to create that fluffy look. When shooting in the day this look is almost impossible to achieve without an ND filter. The Cokin filter set allows you to invest in one good filter and use it on every lens you own.

3.       fit all my lenses

4.       Custom mount. As you may know I do a lot of experimental photography and some of which requires me to mount things such as Custom Bokeh shapes to the front of my lens. I simply cut the shapes out of card and side them into the Cokin filter holder.

 
5.       Fits all my old round Filters?!?! Filter adapter!!

Universal Round Filter Mod
Yep you heard me! Before I invested in the Cokin filter set I used standard round filters and as I already had polarizing filters never got the Cokin one. Anyway I had a car shoot planned and suddenly realized my polarizing filter for that thread size was damaged. This is when I had a stroke of genius and realized that I could just mount them to my Cokin holder.
 What you need:
·         I round filter (bigger size the better)
·         The Cokin holder with the mounting ring for the lens you want to use
·         The Cokin mounting ring for the tread size of the filter
 
Universal Round Filter Mod
What to do:
Simply mount the holder on the lens then screw the round filter onto the other mounting ring. Next just slide the round filter with the mounting ring into the holder and you are ready to go with no damage to any of the products. If you own Cokin mounting rings for all your lenses the chances are you have a mounting ring for your round filter size anyway.


If you are new to Cokin filters I recommend looking at the 3rd party sets like this one. They are very affordable and a good stepping stone to professional filters.
24pcs Square Full + Graduated Filter Set + 9 Size Adapter Ring for Cokin P LF78


hope this helps everyone interested.

AlexAndrews


Prime Time - Why Shoot Prime Lens/Lenses

What is a Prime lens?

Unlike a Zoom lens, prime lens are fixed at a focal length so do not zoom. It’s really as simple as that!

So why use a prime lens?

Creativity

I truly believe that prime lenses force photographers to be more creative. The problem with a Zoom lens is that is allows the photographer to be lazy and learn little about focal length and perspective. Remember photography is an art! Shortcuts just stop us exploring our creativity and learning new skills.  A fixed focal length means you actually have to move your camera to frame your subject and because of this it also encourages the photographer to look at the world from new angles. This along with aperture (that I talk about in a minute) encourages and photographer to introduce the idea of depth into an image.
Bang for your buck


Nikon 50mm f/1.8
Due to having no zoom, prime lenses have far fewer lens elements and moving parts, this makes prime lenses relatively cheap. Here is where I have to mention aperture/speed if you don’t know. A lenses speed has nothing to do with how fast they focus (this trips up most amateurs) but is actually talking about maximum aperture diameter, or minimum f-number. A fast lens has a large maximum aperture diameter, that allows for more depth of field and better performance in low light, as more light can be captured. This along with glass quality is what you tend to pay for in the professional lenses. So back to prime lenses. Because of the simplistic nature of fixed focal length lenses, prime lenses tend to be fast and often have an aperture as wide as F/1.8 or F/1.4 and some even go as wide as F/1.2.

Let’s put this into perspective

A cheap, standard 18-55mm f/3.5-5.6 kit lens at 50mm has an aperture of about f/5.0 and costs around £150.

A more professional lens for example a Nikon 17-35mm f/2.8 can cost around £1000.

In contrast I got my first professional prime lens, the Nikon 50mm f/1.8 for just £95.


What I think
Don’t think that the contrast in price makes the prime lenses anything less on a good professional choice. Prime lenses are an amazing option for anyone looking to produce better professional work. I believe professional, affordable, fast lenses like this are a vital part of my kit. I would recommend to everyone with a DSLR to invest in a prime lens.
Canon EF 50 mm f/1.8 II Lens
Nikon AF NIKKOR 50mm f/1.8D Lens


AlexAndrews

Tuesday 26 March 2013

Aperture Shape & Custom Bokeh blur

Have you ever looked at the out-of-focus areas in an image and wondered why all objects and more notably objects like a lights blur in a round shape?  Playing with my Camera Obscura got me thinking about aperture shape and Bokeh blur.  I think it is important to know that the out-of-focus parts of an image actually acquire the shape of the aperture. This got me thinking about creating a custom aperture shape. As I don’t fancy opening a lens up, its possible to mound an aperture modification to the front of a lens much like a filter, just so long as the new aperture is smaller than the original aperture in the lens(if not the shape is clipped by the old aperture). The only real problem is that once the new aperture is mounted, the original aperture becomes obsolete, so control over the aperture is lost. It’s also important to remember the max aperture will be stopped down a few (depending on the size of your shape) as this is now your new aperture. This becomes annoying as this whole project is about creating Depth of Field and out of focus areas.

So where to start?

I wanted to start simple, so just used some card that I cut to the size of my Cokin filters. This way I was able to mount them easily. In the center for each card, I cut my new aperture shapes and then could just slide them into my Cokin Filter Holder.

Bokeh Filter and Standard Bokeh Shape
Let’s Take Some Shots

I found that my 50mm f/1.8 was the best choice of lens and simply whacked it out-of-focus and took some photos of some old Christmas lights.


What I Found

1.       The more out-of-focus an image is, the larger the shape shows. This allows you to control the size, but only when none of your image needs to be focused. Obviously ,when shooting with part of your image in-focus, depth of field controls/limits this

2.       Using a Cokin filter holder is a good way to mount the aperture filters

3.       As the filter becomes your new aperture exposure and DoF will be affected

4.       It’s worthwhile to make nice filters once and keep them in your bag


While searching online I also came across some pre made “creative aperture kits” like this one below. I Have not had a chance to try them yet but defiantly worth a look.
Lensbaby Creative Aperture Kit

AlexAndrews


Monday 25 March 2013

Hobby Craft A1 Foam Core for Studio Backgrounds & reflector


Teddy Taken on the Red Background
Had what feels like the longest week ever but over the weekend managed to make it to Hobby Craft that’s always good for anyone creative. While there I picked up some A1 sheets of Foam Core board that I am using for product shot backgrounds. I also picked up a bit that is reflective silver on one side and white one the other that makes for a perfect bounce card reflector for the studio, they also sell a gold one. Being rigid also makes it easy for a model to hold it when shooting clamshell light portraits. All in all well worth the trip, here are 3 photos I took to test my backdrops out.


If you are new to using reflectors you really need to have a go, as manipulating natural light is a cheap and easy way to improve your photos and learn the basics of light. There is also nothing wrong with cheaper reflectors like this one. 43" Collapsible Disc Reflector for Studio or On-Site Use 

I use reflectors like this all the time and having zip on Silver, gold, white and black panels make it perfect for most situations. A transparent centre also makes it an easy flash diffuser when other options are unavailable.

AlexAndrews

Coke Taken on the Black Background
Milk Splash


Wednesday 20 March 2013

Coronet Ambassador Digital Camera Obscura

Self-Portrait With
Coronet Ambassador
After my last post I thought I would add a little about how I took digital photos with the Coronet Ambassador. Basically for these I cheated as I used a focus screen mounted on the back of the camera at the same distance from lens as the film would be. I then opened the shutter and the upside-down projection of the room was projected on the glass. I then photographed the image and rotated it in post. Yeah I know a massive cheat but what it proves is that if a digital sensor was mounted at the same point as the focus screen an in focus image would be created.

AlexAndrews


My Room With
Coronet Ambassador

Coronet Ambassador

Product Shot
Coronet Ambassador
When I see a vintage camera like this for only £4 I could not help but buy it. The Coronet Ambassador was created in England around 1955 and is made from metal and Bakelite. It shoots on 120 film and uses a fixed focus and small aperture to create a focus image. The only controls are a normal of bulb mode for the shutter and a green filter to enhance black and white photos.  I am yet to test this with film but when I do I will show you my results. This is the camera that inspired me to create a Camera Obscura and even if I never use it in anger it just nice owning a little of photography history.
One thing I did try was adding a digital sensor to this camera and using it like a Camera Obscura the results were interesting but need fine tuning.

AlexAndrews


Home-Made Softbox

think all photographers need to have an inventive attitude and the ability to create solutions to any problem. I have always liked making things and I am sure you will discover just how much as I develop this blog. Anyway my Uni room is small, like really small and setting up big studio equipment for little photos is a little pointless in such a small space.

Home-made Softbox

What I wanted was a small softbox for a speedlight that I could use for small product shoots. I decided I would use the same card as my Camera Obscura as it was dense and has a white side. This would be ideal for the softbox as it would reflect all usable light. I cut the card into 4 parts to make each side of my softbox and joined them using cable ties like little stiches. I them taped the joints using gaffa tape to remove light leeks. At the bottom of my softbox I left a whole that the head of my SB-900 would fit into. As a diffuser panel I used white cotton and added hooks to each corner so I could clip it to the front of my softbox. The whole product only took about an hour.

I am really happy about how this turned out and it works well as a quick light modifier when working in small spaces. Hope this helps anyone who was looking to make a softbox and please comment and link me some photos of your examples.

AlexAndrews

A Camera Is My Canvas


West Downs In The Fog
It is oftens said that a camera is a photographers’ paintbrush. This is believed to be misleading! I don’t care what other say, my camera is my canvas and light is my paint! A camera never creates an image like a brush and so blank before being painted. As light is my paint, a light source is my brush and the art is in the creation and controlling of light. Creating and determining what light is captured on my canvas is the art I will spend a lifetime learning.
 
AlexAndrews

David hobby Inspired Youth Image


Even Alone - Always Connected
As part of my university course studying digital media design I was asked to create an image of a contemporary youth. There are many aspects of youth life that I could have focused on but if I am honest they have been done to death. For me the thing that stands out about youth today is how they are always connected even when alone they are always online talking to friends. My idea was to create a David Hobby style image of a youth sat in bed on Facebook on a laptop.

My lighting setup

I used all artificial studio lighting, I used 2 studio strobes in large soft boxes as fill light and artificial Ambient light to allow me to have more control than standard lights. Next I used a Speedlight laying on the laptop keys pointing to a white bounce card over the screen. This reflects what looks like a laptop glow into the models face with a shadow on the wall behind.

What do I think?

I really enjoyed taking this image and experimenting with the flash setups and really think people should give it a go. Also go and check out David Hobby, his work and blog.
AlexAndrews

Tuesday 19 March 2013

Camera Obscura

I guess there is only one place to really start my blog on photography… Yes the Camera Obscura. Don’t you find it odd that the modern camera uses the same basic principles as technology invented around 2500 years ago? I know the Camera Obscura has no real commercial uses today but I think we can all learn something from creating one for ourselves and for the little geek that is inside all photographers, it’s pretty awesome too.  

 My Background With Camera Obscura
I think my first really experience of a Camera Obscura was during the 1999 total solar eclipse where we used them to protect our eyes as we could look at a projection of the sun. It’s odd that I would remember the little pinhole Cameras we used as I was only about 8 years old. However for some reason it stuck and I locked this knowledge away. The next time I really thought about the idea of a Camera Obscura was with my Dad. I guess my Dad will come up a lot in this blog as I have to put my creative and experimental attitude to life down to his influence not forgetting why I can get so OCD about my projects. My Dad is the kind of Dad who seems to be able to make anything and as I grew up there where very few weekends went by were we were not making something.  Despite me being the only one to really push photography my Dad seems to love playing with optics and equipment like that. I guess working as a surveyor meant he is always using cool kit too. He has also made his own telescope that sadly, being at Uni, I have not had a chance to play on the latest generation of. Anyway back to the point… One day he decided to convert our living room into a large Camera Obscura and the results were quite cool.

My Attempt With Camera Obscura

My Camera Obscura setup and results
So that leads us to now and I was in town looking at some boot sale style deal and found a box camera that uses a fixed focus but a small aperture to create an in focus image. This triggered my memory and I began to think about creating pinhole cameras and try a camera Obscura again. In my dad's’attempt we came across a few problems one being that my living room at home was a pain is the ass to make light proof, the other being that it would have been nice to have a way to quickly adjust the aperture to test how it changes the image. The light leaks for my attempt were no problem as a search in the attic uncovered a huge piece of cardboard that would cover my window in one go and then a min with some gaffa tape and job done. For the aperture adjust problem I found a solution that I was frankly quite proud of. I borrowed a lens from a photo enlarger and unscrewed all the glass. This left me with nothing but a fully manual aperture ring. I cut a hole in my card and screwed this into place.  The 3 images show my setup and results. I don’t really need to go into much detail about the science behind this as there is loads online about how it works but I hope that some of you will give it a go.

AlexAndrews